Showing posts with label Classroom Decor. Show all posts

Friday, August 9, 2013

Five for Friday

I'm so happy to be linking up again with Doodle Bugs Teaching for Five for Friday. Here are my top 5 for the week.

1. I am so Glad I Took the Time to Do This Last Year.
I've talked a little bit about having to switch grades but I have not yet talked about moving rooms. Since I was going to kindergarten, they wanted me to switch to the classroom catty corner from my current room so I would be directly next to the other kindergarten teachers. The teacher who was currently in that room was moving to my spot in first grade so the move made perfect sense. Anyhoo! On our last day, we decided that we would recruit our kiddos to help up. I thought maybe they could take their chairs and some book boxes. Little things.....boy was I wrong. These kids were well oiled machines. I was moved into my new room within an hour and a half. At the end, I was handing kiddos things like a tape dispenser, a stray book, and a glue stick to move. Then the next kid would get a manipulative tub and a table caddie. It was nuts and they were AMAZING! I appreciated them so much.
 
Here's where the story goes a little sour but no worries it has a happy ending. This was how they stacked my stuff in my new room.
 
 
Holy Pickles! I could have died! The scary thing is the pictures don't show all of it. Ahh!
 
 
Then I took a deep breath and remember that hours of work and moving was condensed into a little over an hour. I rewarded my little movers with a well deserved Capri Sun and a treat.
 
Now here's the happier part...I took this scary mountain and went through it slowly and put it away in organized fashion. I came in 2 extra morning past my final Work Day to get everything cleared up. I am so glad I did because these are some pictures of the cabinets that I am coming back to this year.
One of my reading cabinets. I love that I left myself a ladybug to look at.

This is one of my math cabinets.

Reading books organized by subject.

My craft and supply closet. Love this closet! Click here to see how I organized it all in more detail.
 
2. Things I have Accomplished this week
I was able to get into my classroom for a little bit this week and start rearranging and getting my classroom back in order. Here are some pics of what is done so far.

I added scrunch borders to all of my corkboards. Click here to learn how. I love all of the colors. So bright!

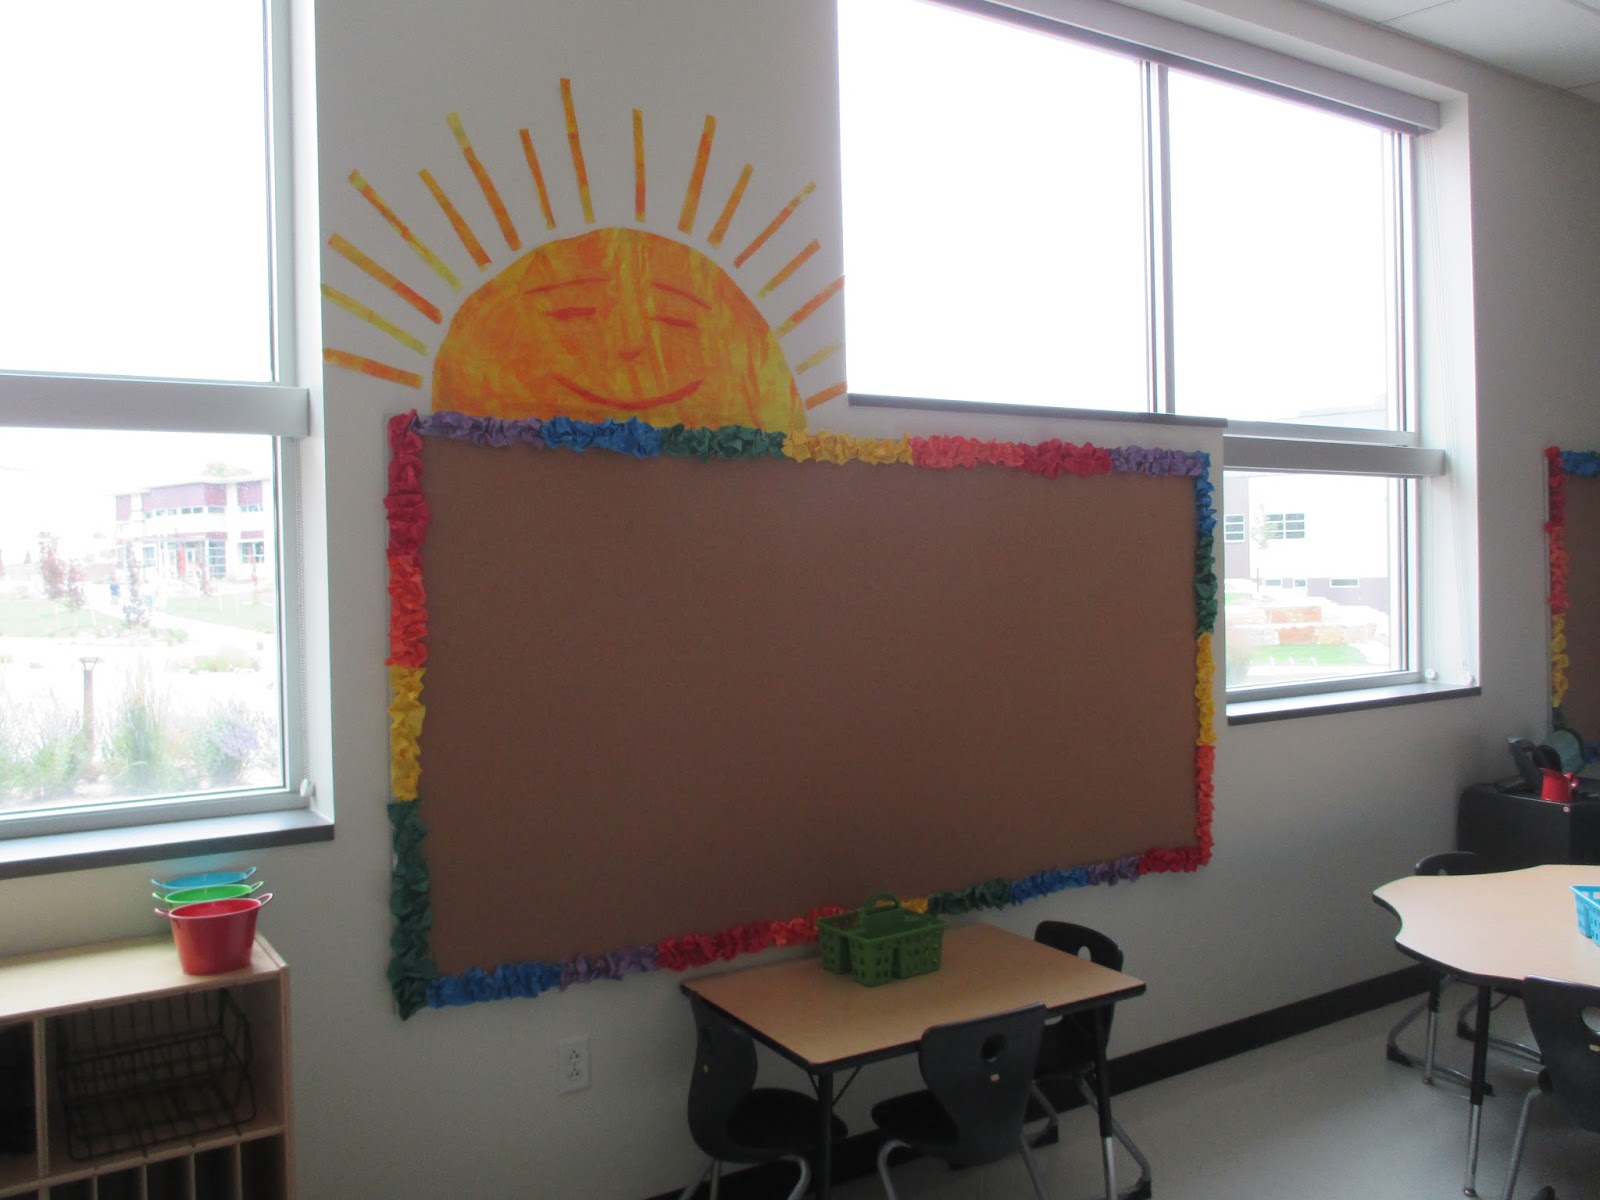
I also made Mr. Sun from the Eric Carle books. He is the first of many characters to make an appearance. Click here to learn how I painted and put him together.
 
4. I Will be Doing This, This Year!
Glitter Germs!  Put it on the teacher's hands, and then have everyone, including the teacher, shake hands with everyone.  Notice how the "germs" spread!        
Love this Glitter Germ idea from Little Miss Kindergarten! You put some of the hand sanitizer on your hand and then have everyone shake hands. Notice how the "germs" spread! So good for teaching hand washing habits.
When they know letter/sound, they add that letter to their tree!  Great assessment idea!
The fabulous Mrs. Jump has her students add letters to their tree when they know the sound/letter. Super cute and a great visual for working on letters. Will definitely be doing this!
 
3. Thinking About the First Week Back
lol - and this is why I spend time in my room throughout the summer :-D
Not very nice but so true! Ha. I am at a constant state of writing to do lists and then running to my room to get something, anything done during break times.
5. Living Up My Last Couple Day of Summer With Some Fun and Sun!
One of my best friend's is getting married this weekend. I am so honored to be her Maid of Honor and be there on her special day. I am also excited about the rehearsal dinner being at the Rockies Game and for getting my groove on, on the dance floor!
 
Thanks for stopping by and I hope you get to enjoy some fun in the sun this weekend as well. :)

Thursday, August 8, 2013

How to Make Your Very Own Mr. Sun from Eric Carle

Look who will be visiting my room every day this year! Yep that is Mr. Sun and isn't he fabulous. Now I'm not really sure what his real name is but that is what I'm going to call him. I might even have to bust into that Raffi song, Mr. Sun, every once in a while.
I can't help but smile when I see him. Now for those of you who might not know who Mr. Sun is, he is a character that pops up in a lot of Eric Carle's children's books. I used this picture from The Very Hungry Caterpillar to be my guide. I was pretty darn close if you ask me!
Here's another view with more of my classroom. I love that he is right between those big windows. I'll never complain about sunshine in a classroom.

To make him, I used a book as a reference, foam brushes, cups for the paint, a large piece of white butcher paper, a yardstick, and tempera paint in yellow, red, and orange.

I started by painting with yellow in different directions and then repeated with orange. I switched back and forth between the two colors a lot. I made the shape much bigger than I needed because I needed to have extra paint pieces for his sun rays. Don't think too much about this. Have fun with it. Eric Carle calls this making "Pretty Paper" and if you haven't seen the video of him making his art, I highly recommend it.

After I got his body nice and radiant, I used a yardstick to make a straight line across the bottom and then measured out my arch. My sun is just about 35 inches across and the arch is 18 inches from the center. I know he doesn't look that big.
 
After I cut him out, I used a pencil to draw the face and then covered it with red paint mixed with yellow to make a darker orange.  I cut the extra left over painted pieces into 1 inches strips of varying lengths for his rays. I did mine in a short, long pattern. Eric Carle's version is much more random. Make it fit you.
 
To hang it up, I just rolled blue painter's tape on the back of him. The blue painter's tape is great for preventing wall damage. It is also easy to peel off and restick if you don't like how you hung something. 
 
 I'm now even more excited to get started on the other characters. I'll keep posting more pics as I get more of my room done.

Wednesday, August 7, 2013

Scrunchy Borders!

I just started going into my classroom this week. I've officially gotten the room rearranged and I am starting to work on my walls. I felt a little stuck on my bulletin boards this year but after looking at Jennifer's blue border over at First Grade Blue Skies, I was inspired to make my own scrunched border. I wanted to make it fun and colorful so I went all out with rainbow. ROYGBIV anyone?! I decided to leave the cork because I didn't want to add a color and make the look overwhelming. I really love the way it turned out.
 
This will be my future reading table/desk. One board will be our group names, reading strategies, and goals. The other will be a phonics reference chart and pocket chart for skill building.
 
I also have another large board that I am going to use as my word wall for this year. I have a little table that I am going to put in front of it so kiddos can work there during Work on Writing.

Here are the supplies that you need to make your own. I tore off large pieces of butcher paper and then cut them into strips using a paper cutter. Also be sure to use a good stapler that will open up all the way. Mine was a little fussy and kept jamming. It almost ended up getting to know the trash can better. :)

I had the pieces folded in half for cutting so this red piece gives you a better look at what the length is. It's about 2 feet long and maybe 4 or 5 wide. I know it seem big but remember that you are scrunching it.
 
I would not use regular paper for this. The butcher paper works well because it is thin and easy to manipulate. I think newspaper, thin scrapbook paper, and tissue paper would work just as well.


I liked starting in the top right hand corner and then working down and around. This helped me keep my pattern of ROYGBIV; however, if you are using one color or like to be spontaneous, start wherever. To start at the corner, all I did was pinch and wrinkle the paper. When I thought it looked good, I added a staple and moved down. It's a little awkward at first but then you get a groove going.

 I found that if I looped both of my fingers under the paper and pulled it forward and then wrinkled the bottom, it looked a little nicer. The beauty of making this border is if you don't like something pull it off and restaple it. I did it several times on my word wall board and you can't tell at all. I also tried wadding the paper in a ball first before stapling it but I didn't like it as much.

 Here's a view of all of the boards together. I'm so excited about these! Now I just need to get to work on the rest of the room!